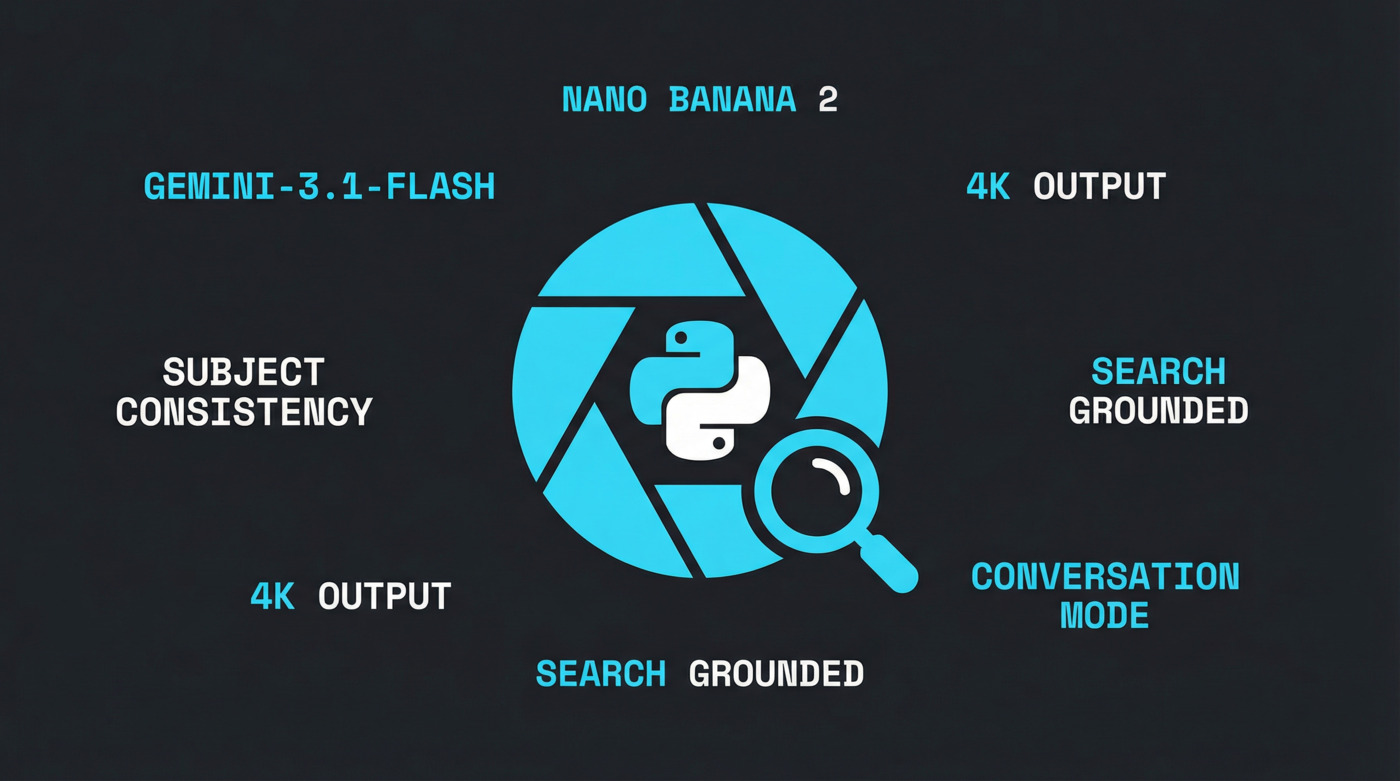
Nano Banana 2 Image Generation with Python: A Practical Guide to the Gemini API – Google has a habit of releasing genuinely impressive things and then naming them in ways that make absolutely no sense at face value. Nano Banana 2 is one of those.
Behind that name sits gemini-3.1-flash-image-preview, Google DeepMind’s latest image generation model and the direct successor to the original Nano Banana, which itself became one of the fastest and most capable AI image generators available when it launched in early 2025.
Nano Banana 2 launched on February 26, 2026, and it is a meaningful step forward.
Faster generation, 4K resolution support, tighter subject consistency across up to 14 reference images, real-time web grounding via Google Search, accurate in-image text rendering with built-in localization, and a conversational editing workflow that lets you iterate on images through a live chat session instead of rebuilding requests from scratch every time.
This guide covers all of it.
You will set up your API key, install the Python dependencies, generate your first image, test subject consistency with multiple characters and objects, ground generation with real-world search results, handle text localization, and build an interactive conversation-mode editor.
Every code block here is complete and runnable. No mysteries, no gaps.
If you have used other AI model APIs before, for example from the Getting Started with Anthropic Claude API guide, the pattern here will feel familiar.
The setup steps are similar: API key, environment variables, client initialization, then actual work.
Key Takeaways
Hide- Nano Banana 2 uses the model string
gemini-3.1-flash-image-previewin API calls, requires onlygoogle-genai,python-dotenv, andpillowas dependencies, and bills per image starting at approximately $0.045 for 512px up to $0.151 for 4K output. - Subject consistency is handled entirely through prompt conventions, not dedicated API parameters. The template
<name> (Character/Object <number>) = Image <index>maps reference images to named subjects, supporting up to five characters and 10 secondary objects in a single request. - Search grounding is enabled via the
toolsparameter withWebSearchandImageSearchtypes. Explicitly instructing the model to use image search in the prompt produces noticeably more accurate location rendering than relying on implicit tool activation. - Text rendering is production-ready for posters, infographics, and marketing assets. In-image localization works by passing the generated image back to the model with a language change instruction, preserving the visual layout while only modifying the text content.
- Conversation mode uses
client.chats.create()andchat.send_message()to maintain session context across multiple edits. Passing the latest generated image back as part of each message content list is what allows the model to apply incremental changes rather than regenerating from scratch. - Nano Banana 2 sits between the original Nano Banana and Nano Banana Pro in quality and cost. It generates at roughly 4 to 6 seconds versus the original's 3 seconds, reaches 4K versus the original's 1K ceiling, and costs about $0.067 per 1K image versus the Pro's $0.134 at the same resolution.
- Always use uppercase
Kin resolution values (1K,2K,4K). Lowercase values are rejected by the API with an error, not silently ignored.
What Is Nano Banana 2?
Nano Banana 2 is Google DeepMind’s codename for gemini-3.1-flash-image-preview, a native multimodal image generation and editing model built on the Gemini 3.1 Flash architecture.
It combines the world knowledge and reasoning quality of the Gemini 3 model family with the speed profile of Gemini Flash, making high-fidelity generation and rapid iteration practical in the same workflow.
The model string used in API calls is gemini-3.1-flash-image-preview.
It sits between the original Nano Banana (gemini-2.5-flash-image) and Nano Banana Pro (gemini-3-pro-image-preview) in the product lineup.
Nano Banana 2 Key Capabilities
Here is what Nano Banana 2 brings to the table:
- Improved accuracy: The model grounds generation using Gemini’s real-world knowledge and real-time web image signals, producing more accurate results for specific subjects, locations, infographics, and data visualizations.
- Enhanced text rendering: Text inside images is now sharp, legible, and stylistically consistent. The model supports localization and translation of in-image text across multiple languages.
- Subject consistency: Up to 14 reference images can be provided in a single request. The model maintains character resemblance for up to five named subjects and fidelity for up to 10 secondary objects.
- Instruction adherence: Complex, multi-part prompts are followed more precisely. The model handles nuanced spatial and compositional instructions that earlier versions struggled with.
- High resolution output: Supports resolutions from 512px up to 4K, with flexible aspect ratios for every format from social media squares to ultra-wide panoramics.
- Visual quality: Richer textures, more accurate lighting physics, and sharper detail at Flash-class generation speed.
Where Nano Banana 2 Is Available?
The model is accessible across multiple Google surfaces. The Gemini app uses it as the default image model across Fast, Thinking, and Pro modes.
It is available in Google Search AI Mode, Google Lens, Google AI Studio, the Gemini API (in preview), Vertex AI, Flow, and Google Ads for creative suggestions.
This guide focuses entirely on the Gemini API with Python. No subscriptions required. You pay per image generated.
Nano Banana 2 API Pricing
Nano Banana 2 is a pay-per-image model through the API. The official pricing uses a token-based structure tied to image resolution, which is harder to read at a glance than a simple per-image figure.
Here are the estimated costs per image at each supported resolution:
| Image Size | Estimated Cost Per Image |
|---|---|
| 512px | $0.045 |
| 1024px (1K) | $0.067 |
| 2048px (2K) | $0.101 |
| 4096px (4K) | $0.151 |
One additional cost factor: Nano Banana 2 supports grounding generation with Google Search, which triggers search queries that carry their own charge.
The first 5,000 Google Search queries per month are free. After that, the rate is $14 per 1,000 queries. For low-volume development and testing, the free tier covers you comfortably.
Setting Up: API Key and Environment
Let’s get started.
Getting Your API Key on Google AI Studio
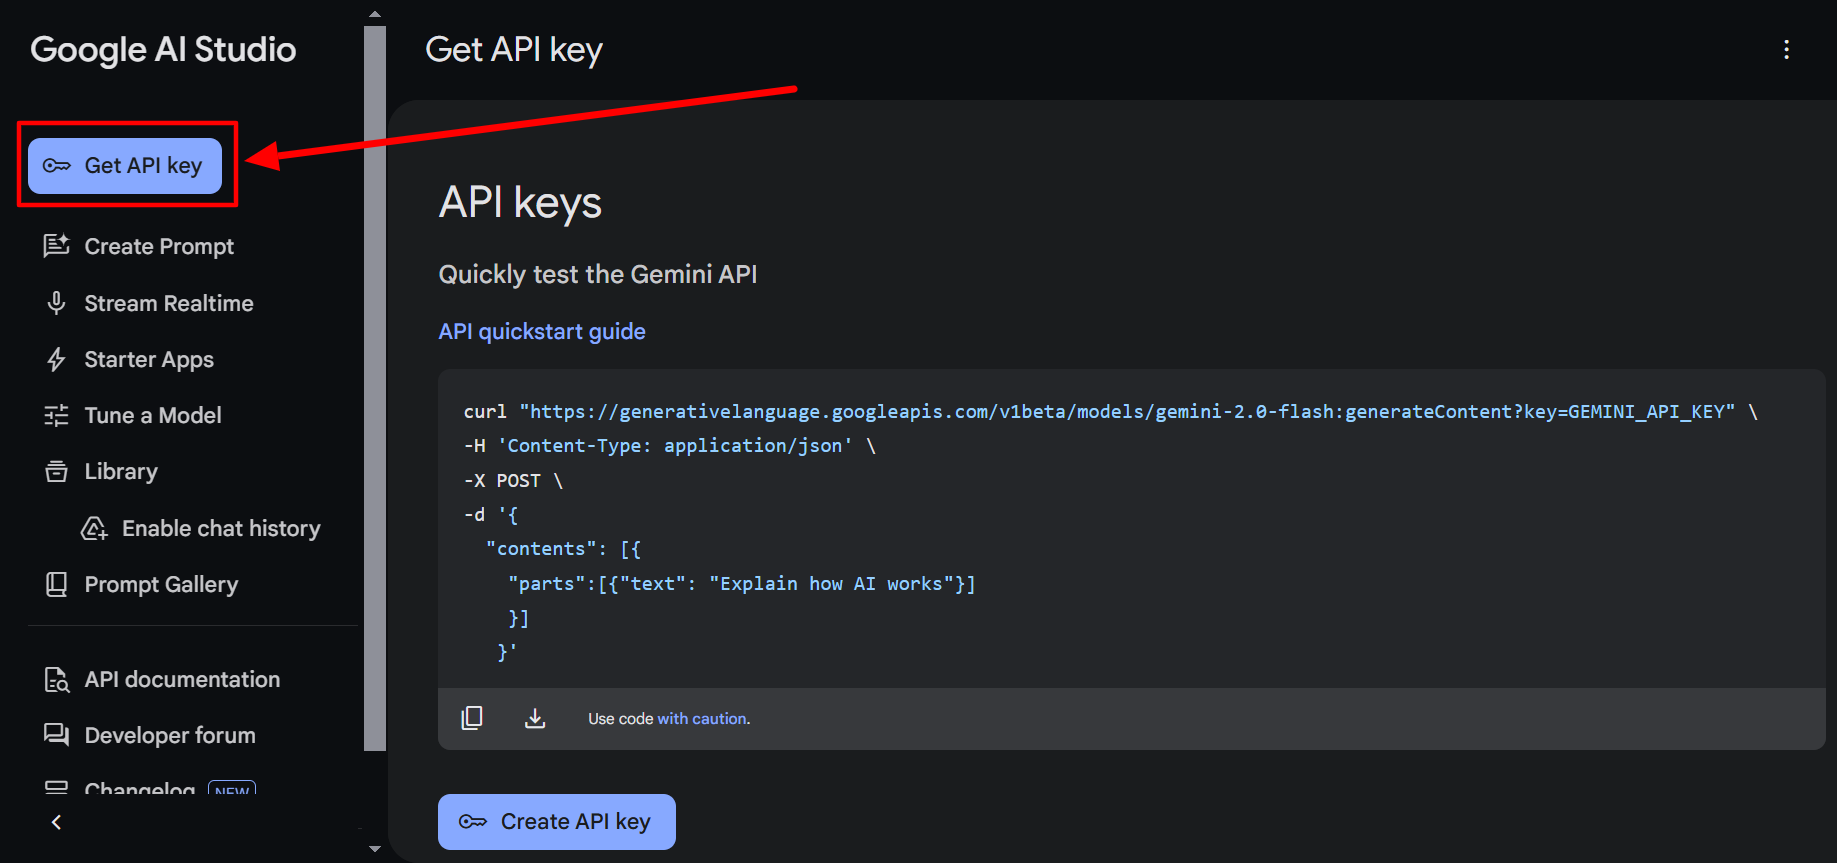
Sign in to Google AI Studio and click the Create API Key button in the top-right corner. The key needs to be linked to a Google Cloud project. AI Studio lets you create a new project directly in the same modal, so you do not need to navigate away.
Once created, the project needs billing enabled before the API will accept requests. A “Set up billing” link appears next to the key in the API Keys dashboard if billing is not yet active.
After enabling billing, copy the key and create a file named .env in the same folder where you will write your Python scripts:
GEMINI_API_KEY=your_api_key_here
Installing Dependencies
Three packages are needed:
pip install google-genai python-dotenv pillow
What each one does:
google-genai: The official Google Generative AI Python SDK. Handles client initialization, request construction, and response parsing for the Gemini API.python-dotenv: Loads environment variables from the.envfile so the API key stays out of source code.pillow: The Python Imaging Library. Used to open local image files and pass them as reference inputs to the model.
If you are working in a virtual environment (which you should be), activate it before running the install command. The Python virtual environment guide covers the setup for Windows, Linux, and macOS if you need a refresher on that.
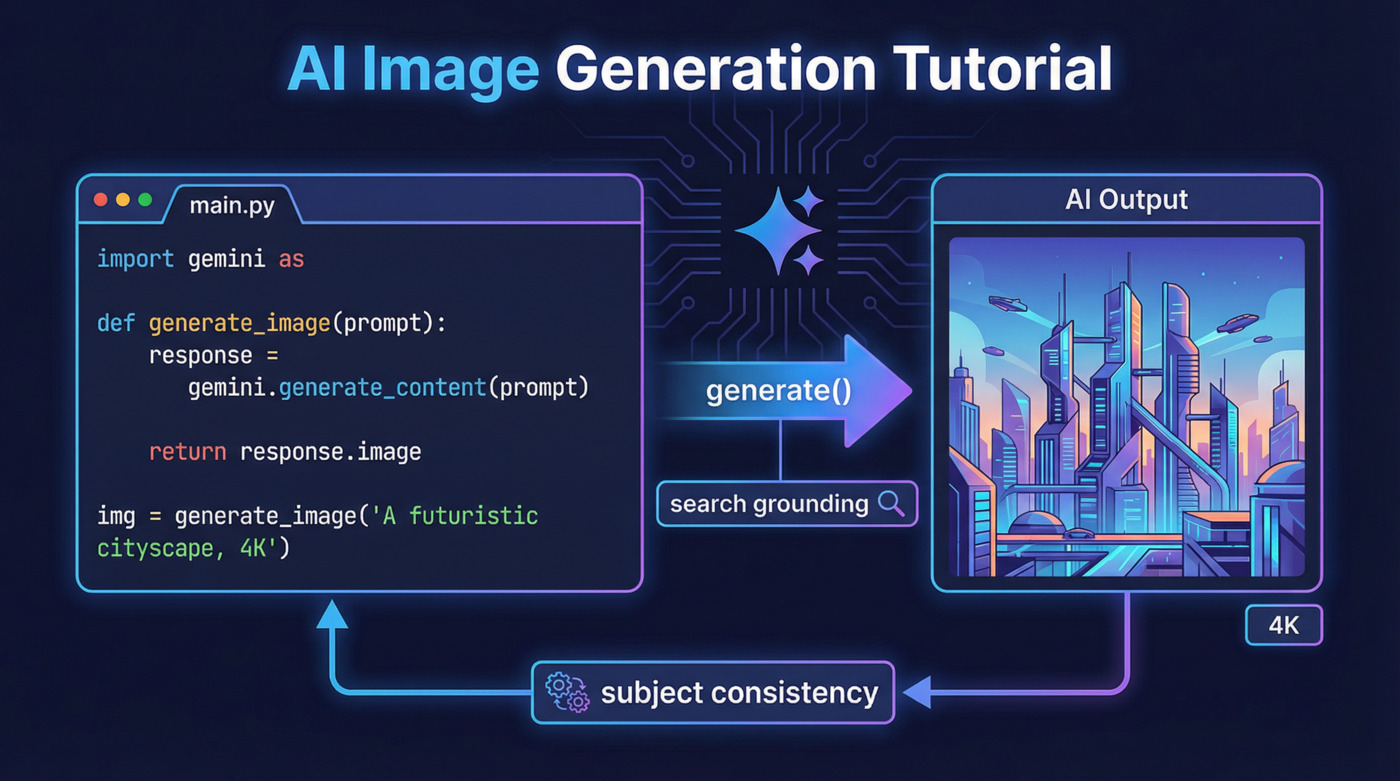
Generating Your First Image With Nano Banana 2 Using Python
Here is the complete code for a basic text-to-image generation request:
from google import genai
from dotenv import load_dotenv
from google.genai import types
import time

# Load API key from .env
load_dotenv()
client = genai.Client()

prompt = """
A Lego version of the Empire State Building under construction.
Workers in hard hats made of Lego bricks, construction cranes,
scaffolding, a clear blue sky, cinematic composition, 16:9.
"""

# Make the API request
response = client.models.generate_content(
    model="gemini-3.1-flash-image-preview",
    contents=[prompt],
    config=types.GenerateContentConfig(
        response_modalities=["Image"],
        image_config=types.ImageConfig(
            aspect_ratio="16:9",
            image_size="4K",
        ),
    )
)

# Save the image; print any text the model returns alongside it
for part in response.parts:
    if part.text is not None:
        print(part.text)
    elif part.inline_data is not None:
        image = part.as_image()
        filename = f"image_{int(time.time())}.png"
        image.save(filename)
        print(f"Saved: {filename}")
The response_modalities=["Image"] tells the model you want an image output. The image_config block sets the aspect ratio and resolution. The response iterates over parts because the model can return a mix of text and image content in the same response. Saving with a timestamp in the filename avoids overwriting previous outputs.
Supported Aspect Ratios and Resolutions
Nano Banana 2 supports a wider range of aspect ratios than its predecessor, including ultra-wide formats added in this version:
- Aspect ratios:
1:1,1:4,1:8,2:3,3:2,3:4,4:1,4:3,4:5,5:4,8:1,9:16,16:9,21:9 - Image sizes:
512px,1K,2K,4K
The 1:4, 4:1, 1:8, and 8:1 ratios are new additions in Nano Banana 2. They cover formats like ultra-wide desktop banners and extremely tall mobile stories. Use an uppercase K in the image_size value. The API rejects lowercase (e.g., 1k will return an error, 1K works fine).
Subject Consistency: Characters and Objects
One of the most practically useful features in Nano Banana 2 is its ability to maintain subject appearance across generated images. You provide reference photos of real subjects, and the model places them in new scenes while preserving how they look. The model supports up to five characters and 10 secondary objects, totalling 14 references per request.
The subject reference syntax is not a formal API parameter. It is a prompt convention the model has been trained to understand. The template is:
<subject_name> (<Type> <number>) = Image <index>
For two characters named Goldie and Wiskers:
Subjects: Goldie (Character 1) = Image 0, Wiskers (Character 2) = Image 1
Image index 0 corresponds to the first image in the contents list after the prompt string.
Character Consistency Example
from google import genai
from dotenv import load_dotenv
from google.genai import types
import time
from PIL import Image

load_dotenv()
client = genai.Client()

prompt = """
Goldie and Wiskers are sitting together on a sunny park bench.
Subjects: Goldie (Character 1) = Image 0, Wiskers (Character 2) = Image 1
Maintain strict subject consistency for characters.
Adjust the subject composition and pose as appropriate for the scene.
"""

dog = Image.open("dog.png")
cat = Image.open("cat.png")

response = client.models.generate_content(
    model="gemini-3.1-flash-image-preview",
    contents=[prompt, dog, cat],
    config=types.GenerateContentConfig(
        response_modalities=["Image"],
        image_config=types.ImageConfig(
            aspect_ratio="9:16",
        ),
    )
)

for part in response.parts:
    if part.text is not None:
        print(part.text)
    elif part.inline_data is not None:
        image = part.as_image()
        image.save(f"image_{int(time.time())}.png")
The model reads the prompt, identifies which image index maps to which subject name, and uses those references to maintain the character’s appearance in the generated scene.
Adding Object References
Objects follow the same convention, with Object replacing Character in the type field. This is what allows you to dress characters in specific clothing or accessories pulled from reference images.
prompt = """
Goldie and Wiskers are posing together in a cozy living room.
Goldie is wearing the Sunglasses, and Wiskers is wearing the Hat.
Subjects: Goldie (Pet 1) = Image 0, Wiskers (Pet 2) = Image 1,
Sunglasses (Object 1) = Image 2, Hat (Object 2) = Image 3.
Maintain strict subject consistency for characters and objects.
Adjust the subject composition and pose as appropriate for the scene.
"""

dog = Image.open("dog.png")
cat = Image.open("cat.png")
sunglasses = Image.open("sunglasses.png")
hat = Image.open("hat.png")

response = client.models.generate_content(
    model="gemini-3.1-flash-image-preview",
    contents=[prompt, dog, cat, sunglasses, hat],
    config=types.GenerateContentConfig(
        response_modalities=["Image"],
        image_config=types.ImageConfig(aspect_ratio="1:1"),
    )
)

for part in response.parts:
    if part.inline_data is not None:
        part.as_image().save(f"image_{int(time.time())}.png")
The model knows the sunglasses belong on Goldie and the hat belongs on Wiskers because the prompt maps it explicitly. No ambiguity, no guessing. Be explicit in the prompt when the assignment matters.
Search-Grounded Image Generation
Nano Banana 2 can use Google Search, including web search and image search, during generation to ground results in real-world visual references. This is particularly valuable for location-based images, where earlier models would often produce plausible-looking but entirely inaccurate scenes.
You enable search by passing a tools parameter in the generation config:
from google import genai
from dotenv import load_dotenv
from google.genai import types
import time

load_dotenv()
client = genai.Client()

prompt = """
Create an image of the Yinhe Cave (銀河洞) in Taiwan at golden hour.
Use Image Search to find visual references of the specified location.
Keep the architectural features, surrounding cliffs, and waterfall
as close to the real reference as possible.
"""

response = client.models.generate_content(
    model="gemini-3.1-flash-image-preview",
    contents=[prompt],
    config=types.GenerateContentConfig(
        response_modalities=["Image"],
        image_config=types.ImageConfig(
            aspect_ratio="9:16",
        ),
        tools=[
            types.Tool(google_search=types.GoogleSearch(
                search_types=types.SearchTypes(
                    web_search=types.WebSearch(),
                    image_search=types.ImageSearch()
                )
            ))
        ]
    )
)

for part in response.parts:
    if part.text is not None:
        print(part.text)
    elif part.inline_data is not None:
        image = part.as_image()
        image.save(f"image_{int(time.time())}.png")
The difference between search-grounded and non-grounded output on real locations is significant. Without search, the model produces something that looks like the place might look. With search, it produces something that looks like the place actually looks. For anything involving real landmarks, specific architecture, or lesser-known natural locations, the search grounding flag is worth the additional per-query cost.
Two things to include in prompts when using search tools: explicitly tell the model to use image search (Use Image Search to find visual references), and describe what visual accuracy you need. The model responds better to explicit instructions about tools than to implicit expectations.
Placing Subjects at Real-World Locations
Search grounding and subject consistency can be combined. You can take your character references and place them at accurately rendered real-world locations:
prompt = """
Goldie and Wiskers are traveling across the Sanxiantai Arch Bridge in Taiwan.
Subjects: Goldie (Pet 1) = Image 0, Wiskers (Pet 2) = Image 1
Use image search to find visual references of the Sanxiantai Arch Bridge.
Maintain strict subject consistency for characters and objects.
Adjust the subject composition and pose as appropriate for the scene.
"""

dog = Image.open("dog.png")
cat = Image.open("cat.png")

response = client.models.generate_content(
    model="gemini-3.1-flash-image-preview",
    contents=[prompt, dog, cat],
    config=types.GenerateContentConfig(
        response_modalities=["Image"],
        image_config=types.ImageConfig(aspect_ratio="16:9"),
        tools=[
            types.Tool(google_search=types.GoogleSearch(
                search_types=types.SearchTypes(
                    web_search=types.WebSearch(),
                    image_search=types.ImageSearch()
                )
            ))
        ]
    )
)

for part in response.parts:
    if part.inline_data is not None:
        part.as_image().save(f"image_{int(time.time())}.png")
The model also accepts geographic coordinates in place of location names. Passing latitude and longitude in the prompt works, and the model searches for visual references matching that specific area. It is not pixel-perfect GPS accuracy, but the environmental elements and architecture reflect the actual location.
Text Rendering and Localization
Nano Banana 2 produces sharp, accurate text inside images, which makes it genuinely useful for marketing assets, posters, infographics, and diagrams where earlier models would produce blurred or misspelled text.
Beyond accuracy, the model supports in-image localization. You can generate an image with text in one language, then ask it to translate the text into another language with a follow-up prompt. The translation preserves the visual layout and design, only changing the text content. And notably, the model is smart enough to leave brand names untranslated unless you explicitly tell it to change them.
Here is a basic example for generating a poster with text, then requesting a language change:
from google import genai
from dotenv import load_dotenv
from google.genai import types
import time

load_dotenv()
client = genai.Client()

# Step 1: Generate the original poster
prompt = """
Create a product launch poster for a fictional VR headset brand called "NovaSphere."
Tagline: "Step Beyond Reality."
Modern tech aesthetic, deep purple and electric blue color scheme,
a person wearing the headset surrounded by immersive sci-fi landscapes.
Include the brand name and tagline as text in the image.
"""

response = client.models.generate_content(
    model="gemini-3.1-flash-image-preview",
    contents=[prompt],
    config=types.GenerateContentConfig(
        response_modalities=["Image"],
        image_config=types.ImageConfig(aspect_ratio="9:16", image_size="2K"),
    )
)

generated_image = None
for part in response.parts:
    if part.inline_data is not None:
        generated_image = part.as_image()
        generated_image.save("poster_en.png")
        print("English poster saved.")

# Step 2: Translate the poster text to Japanese
if generated_image:
    translate_prompt = "Change the language of all text in this poster to Japanese. Keep the brand name 'NovaSphere' unchanged."

    response2 = client.models.generate_content(
        model="gemini-3.1-flash-image-preview",
        contents=[translate_prompt, generated_image],
        config=types.GenerateContentConfig(
            response_modalities=["Image"],
            image_config=types.ImageConfig(aspect_ratio="9:16", image_size="2K"),
        )
    )

    for part in response2.parts:
        if part.inline_data is not None:
            part.as_image().save("poster_ja.png")
            print("Japanese poster saved.")
This two-step pattern, generate first then translate, works cleanly for creating localized versions of marketing assets without rebuilding the visual design from scratch each time.
Conversation Mode: Interactive Iterative Editing
All the previous examples send a single request and receive a response. If you want to refine the result, you have to rebuild the request with the updated image and new instructions. That gets tedious quickly. Conversation mode solves this.
Using client.chats.create(), you open a persistent chat session with the model. Each message you send can include both a text prompt and the current image as context. The model understands what it already generated and applies your edit instructions to it rather than starting from scratch.
Here is a full implementation of an interactive conversation-mode editor:
from google import genai
from google.genai import types
from dotenv import load_dotenv
from PIL import Image
import time

load_dotenv()
client = genai.Client()

# Create a chat session with image generation enabled
chat = client.chats.create(
    model="gemini-3.1-flash-image-preview",
    config=types.GenerateContentConfig(
        response_modalities=["TEXT", "IMAGE"],
        tools=[{"google_search": {}}]
    )
)

# Track the latest generated image to include as context on the next turn
latest_image = None

print("Nano Banana 2 Conversation Mode")
print("Type your prompt to generate or edit an image.")
print("Type 'quit', 'exit', or 'q' to end the session.\n")

while True:
    user_input = input("Prompt: ").strip()

    if user_input.lower() in ["quit", "exit", "q"]:
        break

    if not user_input:
        continue

    # Build the message content
    # Include the latest image as context so the model knows what to edit
    content = [user_input]
    if latest_image:
        content.append(latest_image)

    try:
        response = chat.send_message(content)

        for part in response.parts:
            if part.text:
                print(f"\nModel: {part.text}")

            elif part.inline_data is not None:
                image = part.as_image()
                filename = f"image_{int(time.time())}.png"
                image.save(filename)
                print(f"Saved: {filename}")
                # Update the latest image for the next turn
                latest_image = Image.open(filename)
                latest_image.show()

    except Exception as e:
        print(f"Error: {e}")

print("\nSession ended.")
This script runs a continuous loop in your terminal. You type a prompt, the model generates or edits an image, the result is saved and opened, and you continue with the next edit. Each turn passes the latest generated image back to the model as context, so the model understands what it is working with.
A practical editing sequence looks like this:
Prompt: A tabby cat sitting on a stone garden wall in summer
Prompt: Make it a snowy winter scene
Prompt: Add a green knit beanie on the cat's head
Prompt: Give the cat round tortoiseshell glasses
Prompt: Change the scene to nighttime with string lights in the background
The model carries the character and style through each edit. The cat stays the same cat throughout. Only the requested changes apply.
Nano Banana vs. Nano Banana 2 vs. Nano Banana Pro
Here is how the three models in the Nano Banana family compare:
| Feature | Nano Banana (Original) | Nano Banana 2 | Nano Banana Pro |
|---|---|---|---|
| Model string | gemini-2.5-flash-image |
gemini-3.1-flash-image-preview |
gemini-3-pro-image-preview |
| Generation speed | ~3 seconds | 4 to 6 seconds | 10 to 20 seconds |
| Max resolution | 1K | 4K | 4K |
| Text accuracy | ~80% | ~90% and above | ~94% |
| Web grounding | Internal knowledge only | Real-time web and image search | High-depth reasoning with search |
| Subject consistency | Limited | Up to 5 characters, 14 references | Up to 5 characters, 14 references |
| Cost per 1K image | ~$0.039 | ~$0.067 | ~$0.134 |
Nano Banana 2 is the default recommendation for most use cases. It is significantly more capable than the original while remaining within Flash-class speed. Nano Banana Pro is worth the additional cost in narrow scenarios, primarily when you need extreme photorealism in lighting and skin textures, or when you are working with spatially complex prompts that require deeper compositional reasoning.
For broader AI model comparisons beyond Google’s ecosystem, the Best ChatGPT Alternatives post covers how the major AI platforms stack up across different capabilities, which is useful context when deciding where image generation fits into your tool stack.
Tips for Better Results
A few prompt patterns that improve output quality consistently:
Be explicit about tool use. When using search grounding, the phrase “Use Image Search to find visual references” produces noticeably better location accuracy than omitting it. The model can use tools implicitly, but explicit instructions produce more reliable results.
Describe what to keep, not just what to change. In conversation mode, telling the model “keep the character’s appearance identical, only change the background” reduces unwanted drift between edits. Constraints help.
Use subject labels consistently. When working with multiple characters across several turns in a conversation session, restate the subject mapping if you switch which subjects are in the scene. The model benefits from explicit reminders in complex multi-turn sessions.
Specify resolution when it matters. The default resolution is 1K. If you are generating assets for print or high-resolution display, include image_size="2K" or image_size="4K" explicitly. The quality difference at larger display sizes is visible.
Timestamp your filenames. The f"image_{int(time.time())}.png" pattern used throughout this guide is a simple way to avoid overwriting previous outputs. If you are generating multiple variations, you will want to keep them all.
For a broader look at what other Python-based AI integrations look like in practice, the Gemini AI API guide with Streamlit shows how to wrap Gemini API calls into a visual web interface, which is a natural next step after you have the core generation logic working.
Frequently Asked Questions (FAQs)
Does Nano Banana 2 require a Google AI Pro subscription to use via the API?
No. The API uses a pay-per-image billing model tied to your Google Cloud project. You pay per image generated based on the resolution, with no subscription required. The first 5,000 Google Search grounding queries per month are also free.
What happens if I use the wrong hook or lowercase resolution values?
The API rejects lowercase resolution values like 1k. Use 1K, 2K, or 4K with an uppercase K. For 512px, no K suffix is used. Passing an invalid value returns an error immediately rather than silently falling back to a default.