
xAI’s Grok API provides developers with programmatic access to the Grok series of foundation models. It allows integration of Grok’s AI capabilities into various applications.
The API offers features like tool use, code execution, and support for system prompts, with models supporting context lengths up to 131K tokens.
The API is compatible with OpenAI and Anthropic SDKs. The Grok 4 is the latest model, priced $3 per million token input and $15 per million token output.
Some of Grok AI models are already integrated in various AI vibe coding tools, so if you’re already using one, then you can start testing it.
The $25 of free API credits promotion to test the API and $150 worth of free API credits a month by sharing your API requests to Grok by opting-in to share data with xAI are no longer available.
There are currently no stable rate limits for the Grok API.
What is Grok xAI?
xAI’s Grok API gives developers a way to programmatically use the Grok series of foundational models. This allows them to build Grok’s AI features into different applications.
The API includes functions like tool use, code execution, and system prompt support. The models can handle context lengths of up to 131,000 tokens.
The API works with both OpenAI and Anthropic SDKs. Right now, the Grok 4 is the latest model, priced $3 per million token input and $15 per million token output.
I have covered some other models like OpenAI’s GPT-4.1, GPT-4.5, Anthropic Claude API, as well as the Gemini AI API, so to make it much more complete, let’s explore Grok xAI’s models via its API.
- Getting Started with GPT-4.5: Testing the GPT-4.5 API
- Getting Started with Anthropic Claude API: A Practical Guide
- Getting Started with kluster.ai for Scalable AI
- Getting Started with Groq: Building and Deploying AI Models
- Getting Started with OpenRouter
- Getting Started With Google SERP Scraping With SerpApi
- Gemini AI API: Testing Gemini AI Models with Streamlit
Grok xAI API Available Models and Pricing
Here’s the xAI Grok API pricing:
| Model | Modalities | Capabilities | Context | Rate limits | Pricing / Million tokens |
| grok-4-0709 | Text & Image Inputs → Text Outputs | Function Calling, Structured Outputs, Reasoning | 256,000 | 200K tpm • 120rpm | $3.00 • $15.00 |
| grok-3 | Text Inputs → Text Outputs | Function Calling, Structured Outputs | 131,072 | 600rpm | $3.00 • $15.00 |
| grok-3-mini | Text Inputs → Text Outputs | Function Calling, Structured Outputs, Reasoning | 131,072 | 480rpm | $0.30 • $0.50 |
| grok-3-fast | Text Inputs → Text Outputs | Function Calling, Structured Outputs | 131,072 | 600rpm | $5.00 • $25.00 |
| grok-3-mini-fast | Text Inputs → Text Outputs | Function Calling, Structured Outputs, Reasoning | 131,072 | 180rpm | $0.60 • $4.00 |
| grok-2-vision-1212us-east-1 | Text & Image Inputs → Text | Function Calling, Structured Outputs | 32,768 | 10rps | $2.00 • $10.00 |
| grok-2-vision-1212eu-west-1 | Text & Image Inputs → Text | Function Calling, Structured Outputs | 32,768 | 50rps | $2.00 • $10.00 |
| Image generation models | Per image output | ||||
| grok-2-image-1212 | Text & Image Inputs → Image Outputs | 300rpm | $0.07 |
Notes:
- Pricing is per million tokens
- “rps” = requests per second
- “rph” = requests per hour
- Dashes (-) indicate the capability is not available for that model
Grok xAI API Featured Models
grok-4-0709– The primary large language model that offers direct insights and pure intelligence.grok-3– Good for most tasks.
Sample Grok xAI API Usage
There are ways to make a request to the API.
curl
We can use curl to try out the API. Copy and paste the following command directly into your terminal:
curl https://api.x.ai/v1/chat/completions \
-H "Content-Type: application/json" \
-H "Authorization: Bearer $XAI_API_KEY" \
-d '{
    "messages": [
        {
            "role": "system",
            "content": "You are Grok, a chatbot inspired by the Hitchhikers Guide to the Galaxy."
        },
        {
            "role": "user",
            "content": "What is the meaning of life, the universe, and everything?"
        }
    ],
    "model": "grok-2-latest",
    "stream": false,
    "temperature": 0
}'
OpenAI SDK
If you already have OpenAI SDK like I do, we can just use the following snippet:
from openai import OpenAI

client = OpenAI(
  api_key=XAI_API_KEY,
  base_url="https://api.x.ai/v1",
)

completion = client.chat.completions.create(
  model="grok-2-latest",
  ...
)
Anthropic SDK
Or if you have Anthropic SDK instead, you can use the following:
from anthropic import Anthropic

client = Anthropic(
  api_key=XAI_API_KEY,
  base_url="https://api.x.ai",
)
Getting Grok xAI API Key
To get a Grok xAI API key, you’ll want to start by making an account on the xAI Console. You can either just sign in with your existing X account or, if you prefer, set up a brand-new account just for the xAI Console.
In my case, I just signed in with my existing X account since I only use this for personal purpose only.
Let’s break down the step-by-step guide.
1. Create a Console Account
Get started by accessing xAI API homepage. You might need to scroll the page to have a glance of it. Then you can click the Start building now button to start creating an account.
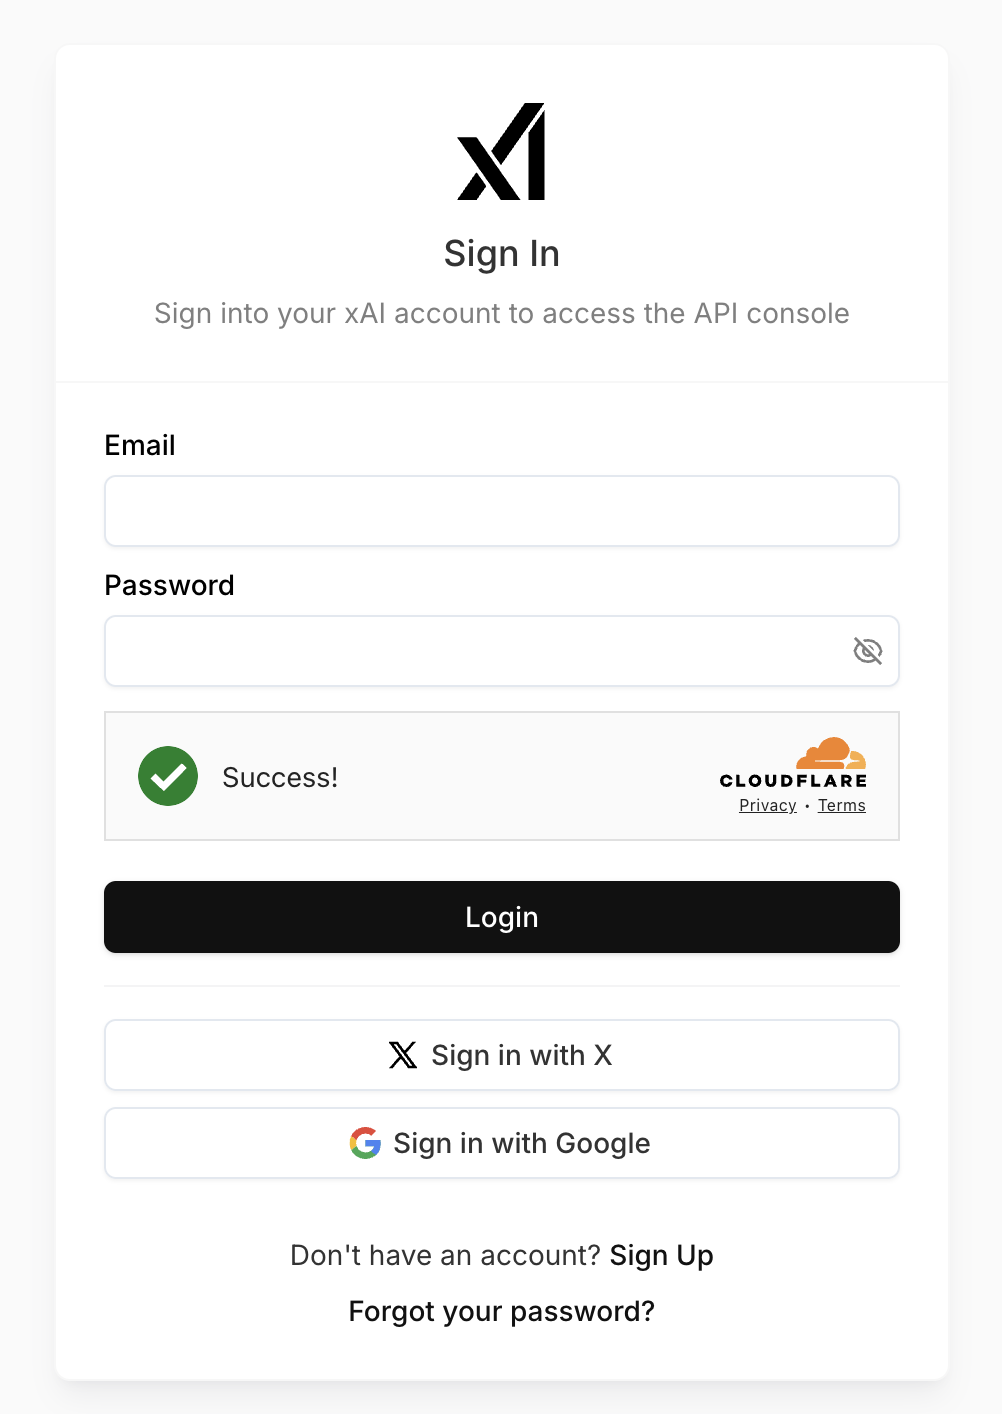
You’ve got three easy ways to sign in: you can type in your email and password, or you can use your X or Google account to get logged in quickly.
2. Account Onboarding and Setup Billing
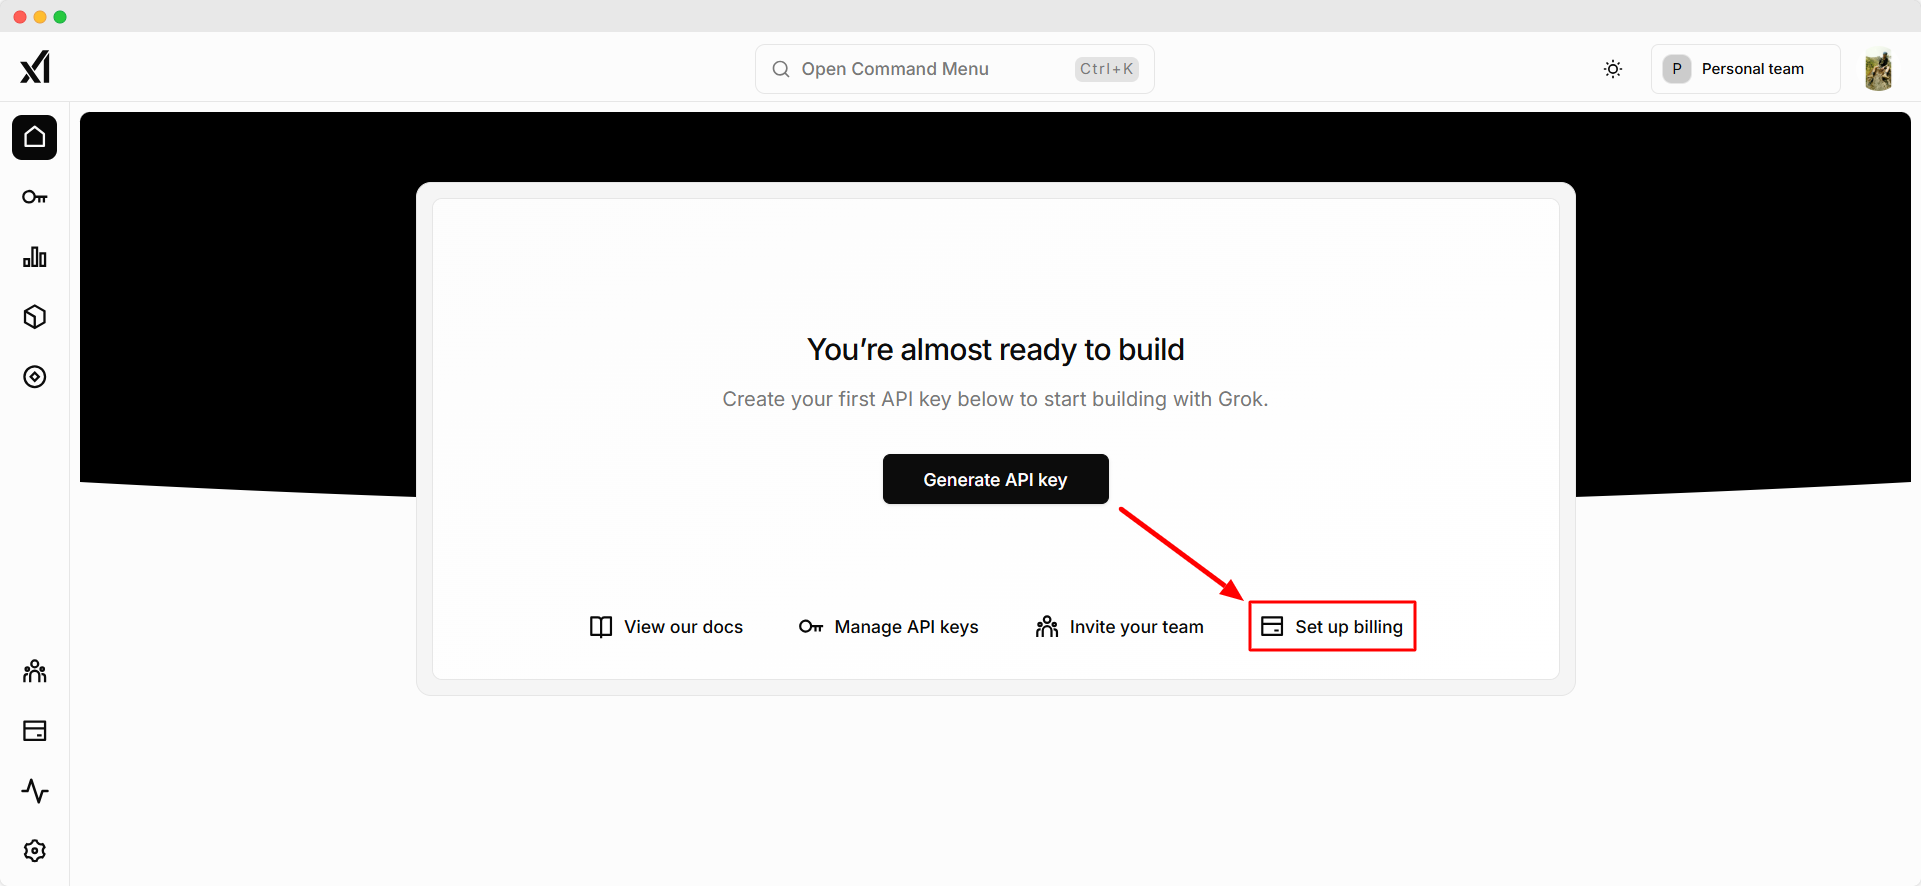
Before being able to generate your xAI API key, you need to setup your billing information first. Start by clicking the Set up billing menu as shown in the screenshot.
Complete your billing information first then continue to the next step.
3. Generate the xAI Grok API Key
Select the key icon on the left sidebar to navigate to the API Keys page. On that page, click the Create API Key button.
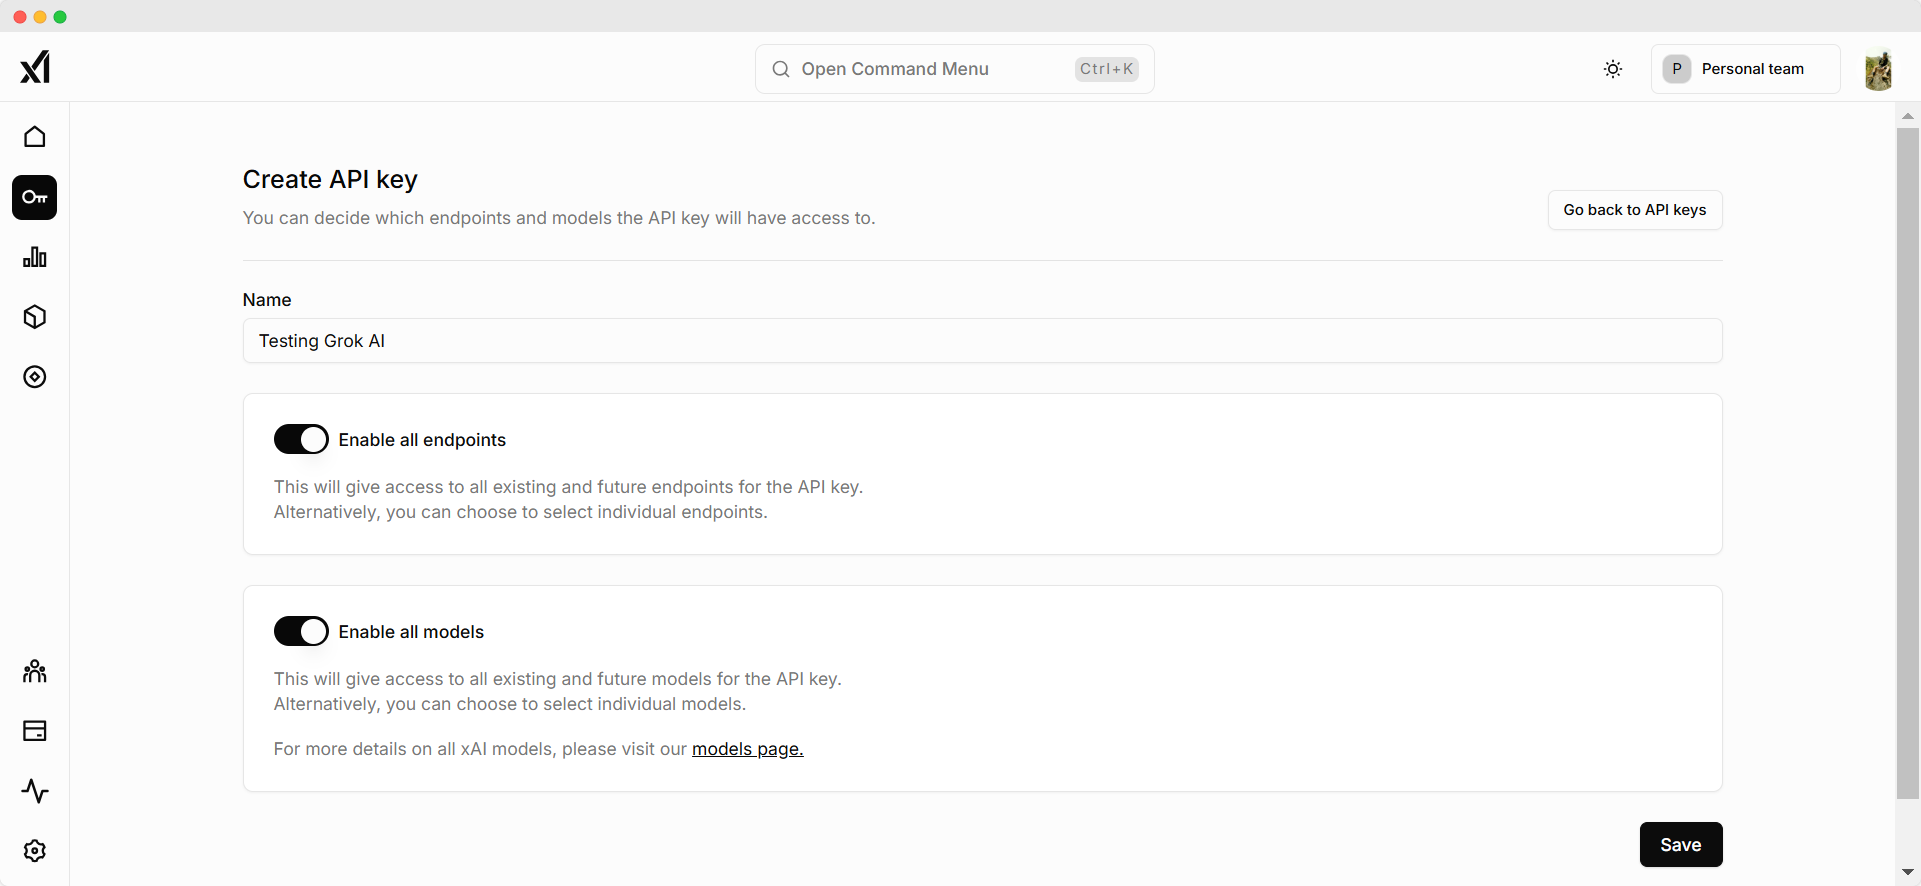
Once you hit “Create API key,” a new page will appear, asking you to give your key a name, choose which endpoints to allow, and select the models it can work with. Then, you’ll get a chance to preview and generate your key.
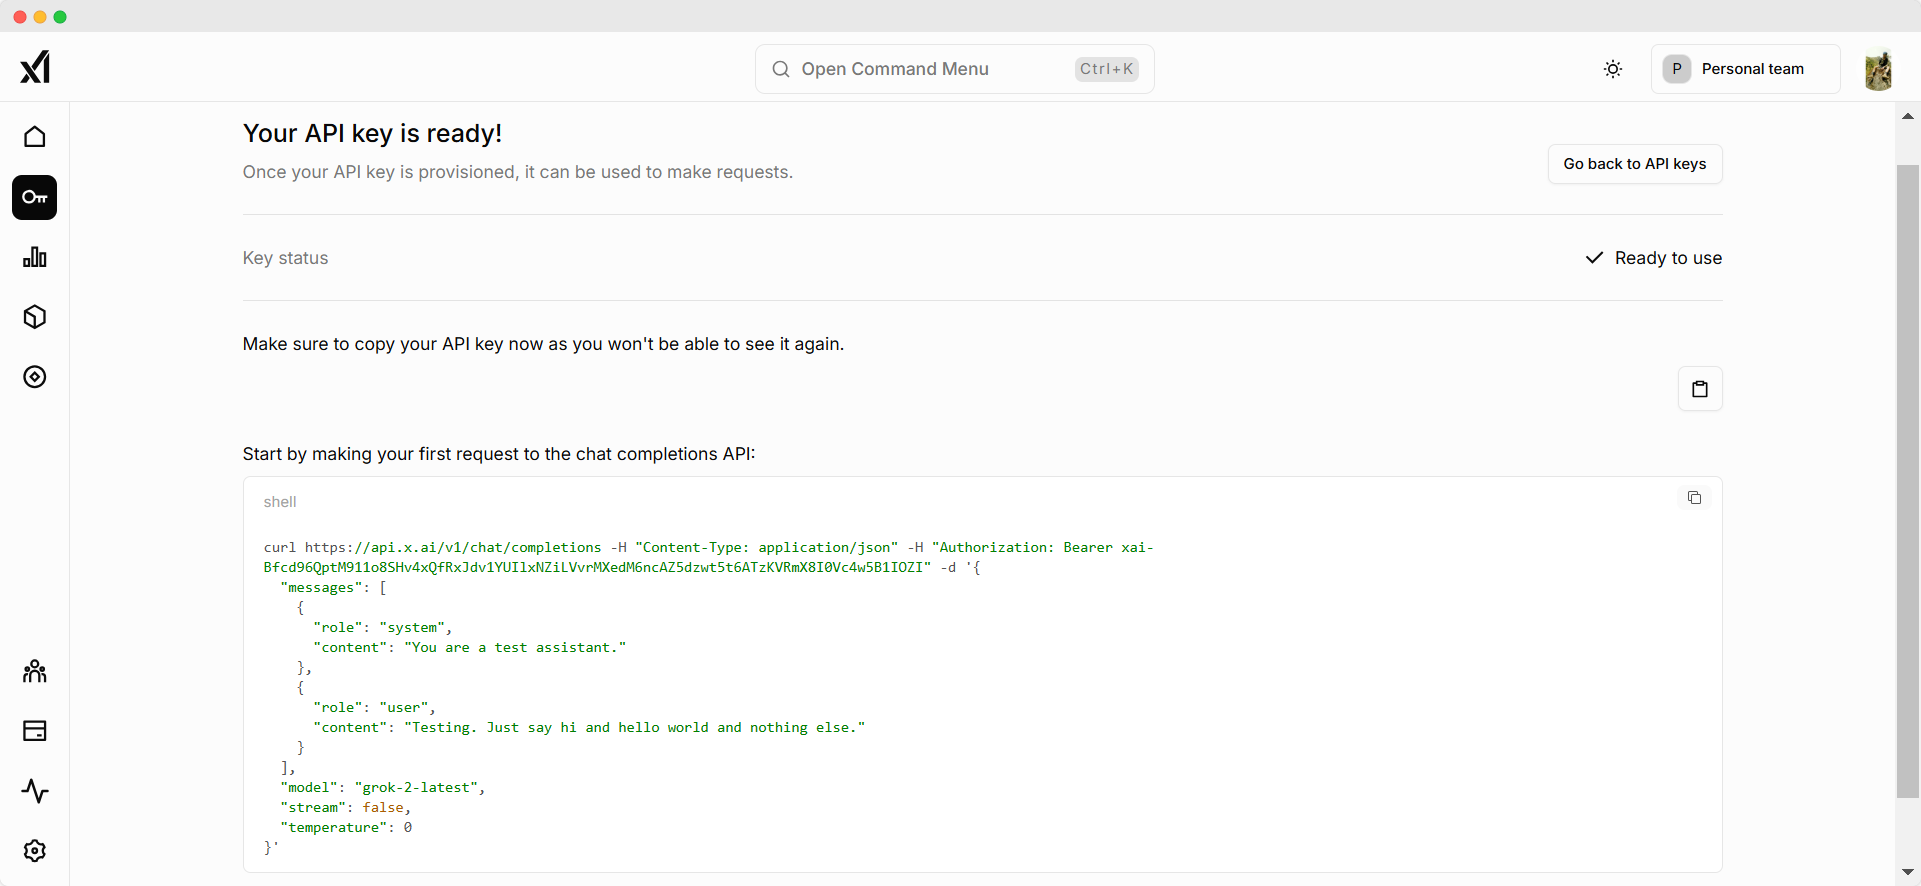
After creating it, you can check how it’s being used and make changes, disable it, or even delete it if you want. Plus, if you need a new key, just click on Create API key again!
4. xAI API Credits: Free Credits, Top Up Credits, and Set Credits Limit
Navigate to the Billing page and click the Credits menu on the left side.
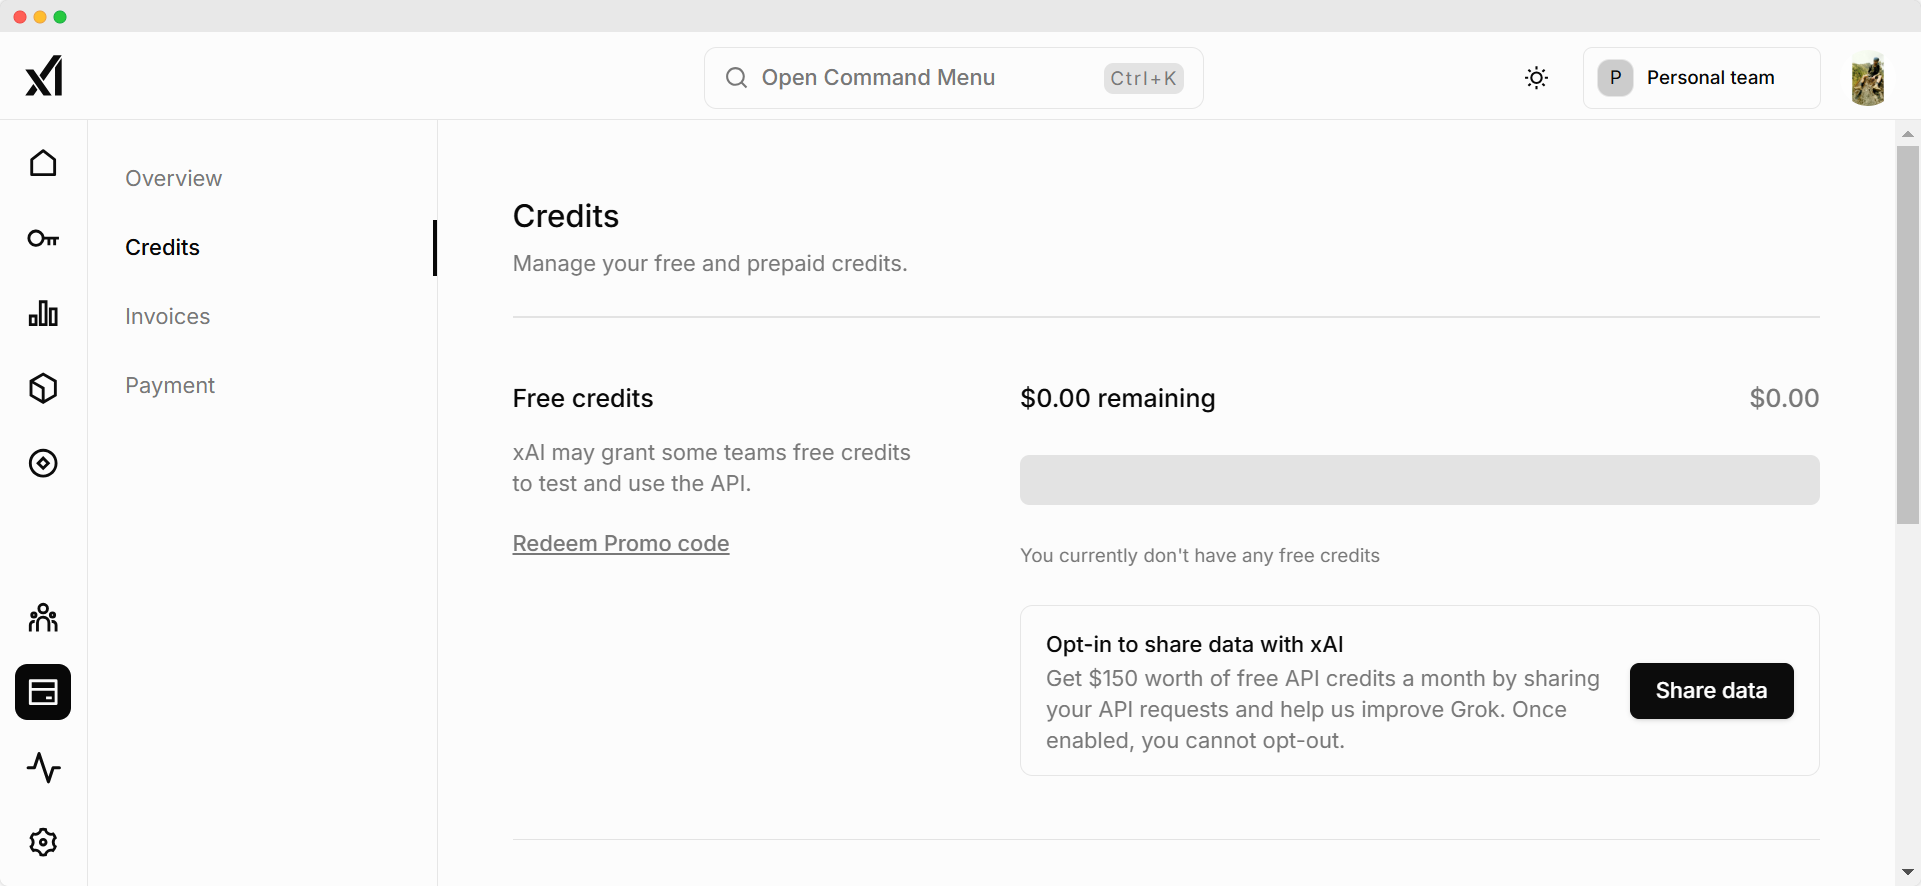
On this page, you can see the available xAI credits you have. Also, you can view the available Free Credits, topup your xAI credits, redeem a promo code, as well as limit the credits usage.
You can top up your xAI credits starting from $5 up to $500 (well at least that’s what it says on my account) using various payment methods such as debit/credit cards, bank, and Cash App.
5. How to Get $150 Free xAI API Credits
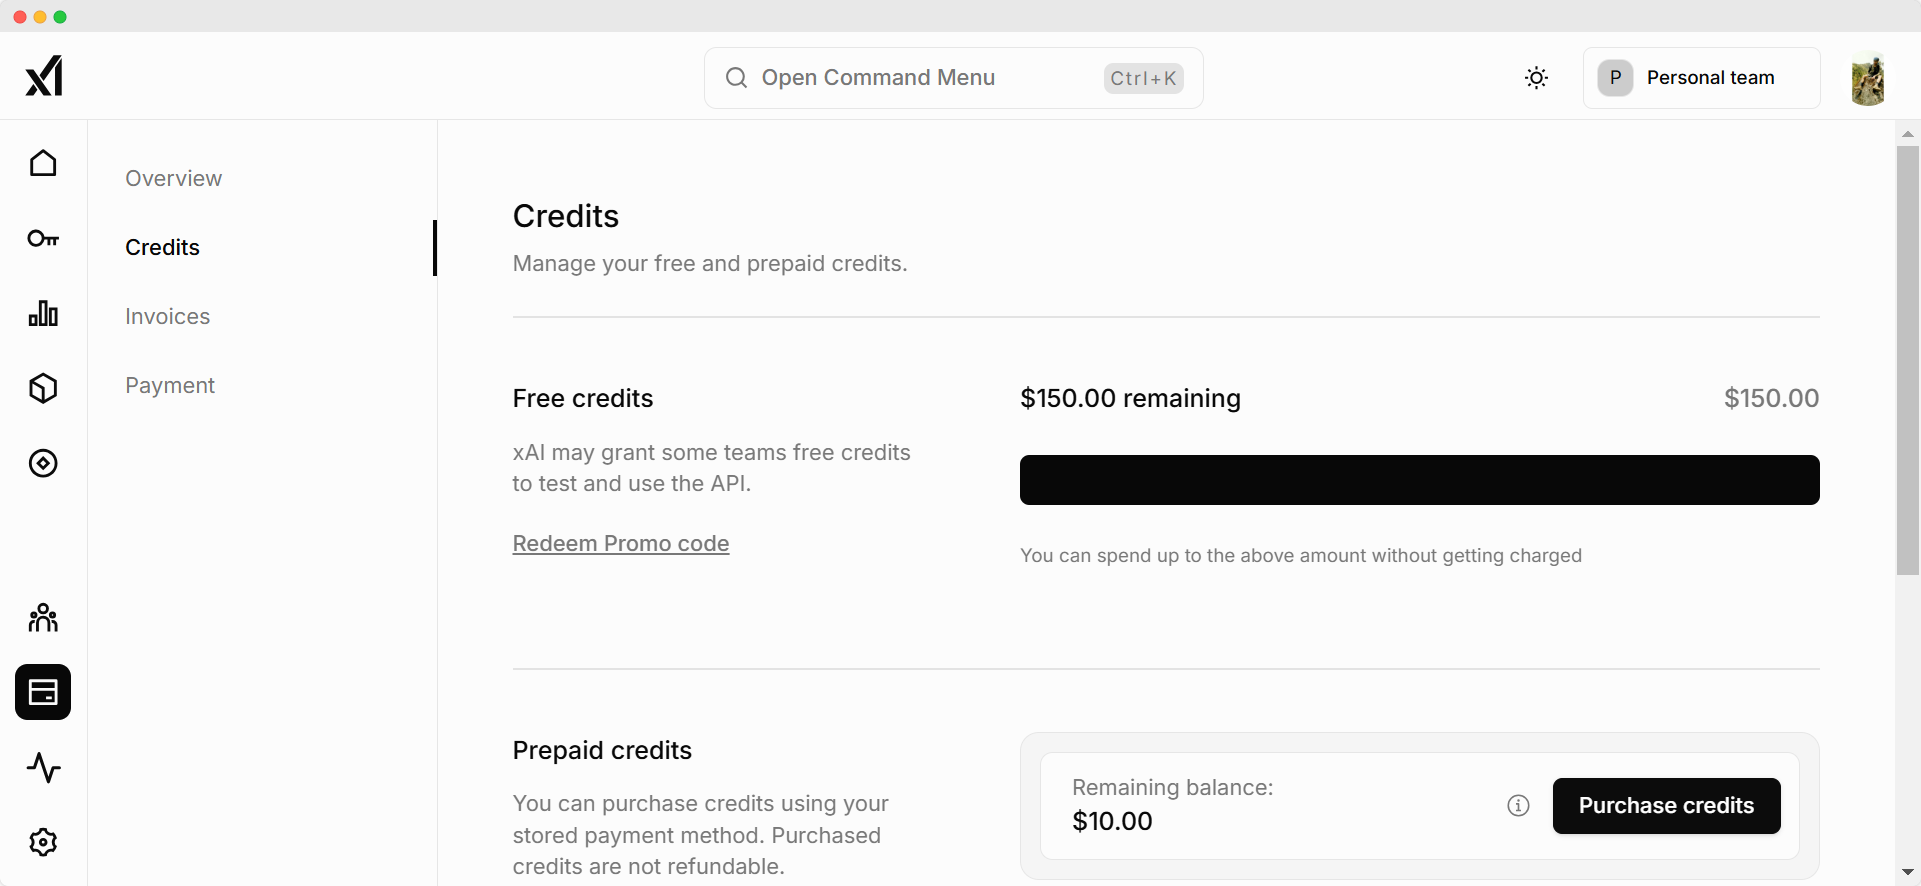
Users on a specific Team can opt-in to share data with xAI and get $150 worth of free API credits a month. But the downside is, we cannot opt-out later for this specific Team.
To get $150 worth of free xAI API credits, your team just needs to have spent at least $5 on the API before you decide to opt in. But in my case, I just topup $10 and the opt-in option is immediately clickable.
Be careful when it comes to agreeing to share your data. Personally, I only do it for testing purposes. If you choose to go ahead with it, just make sure to keep any sensitive information and personal usage on the API to yourself.
6. Explore the Available xAI Models in the API
On the day I’m writing this, the Grok 3 isn’t ready to use in the API just yet. But don’t worry! You can still access the latest Grok 2 API along with other cool AI models.
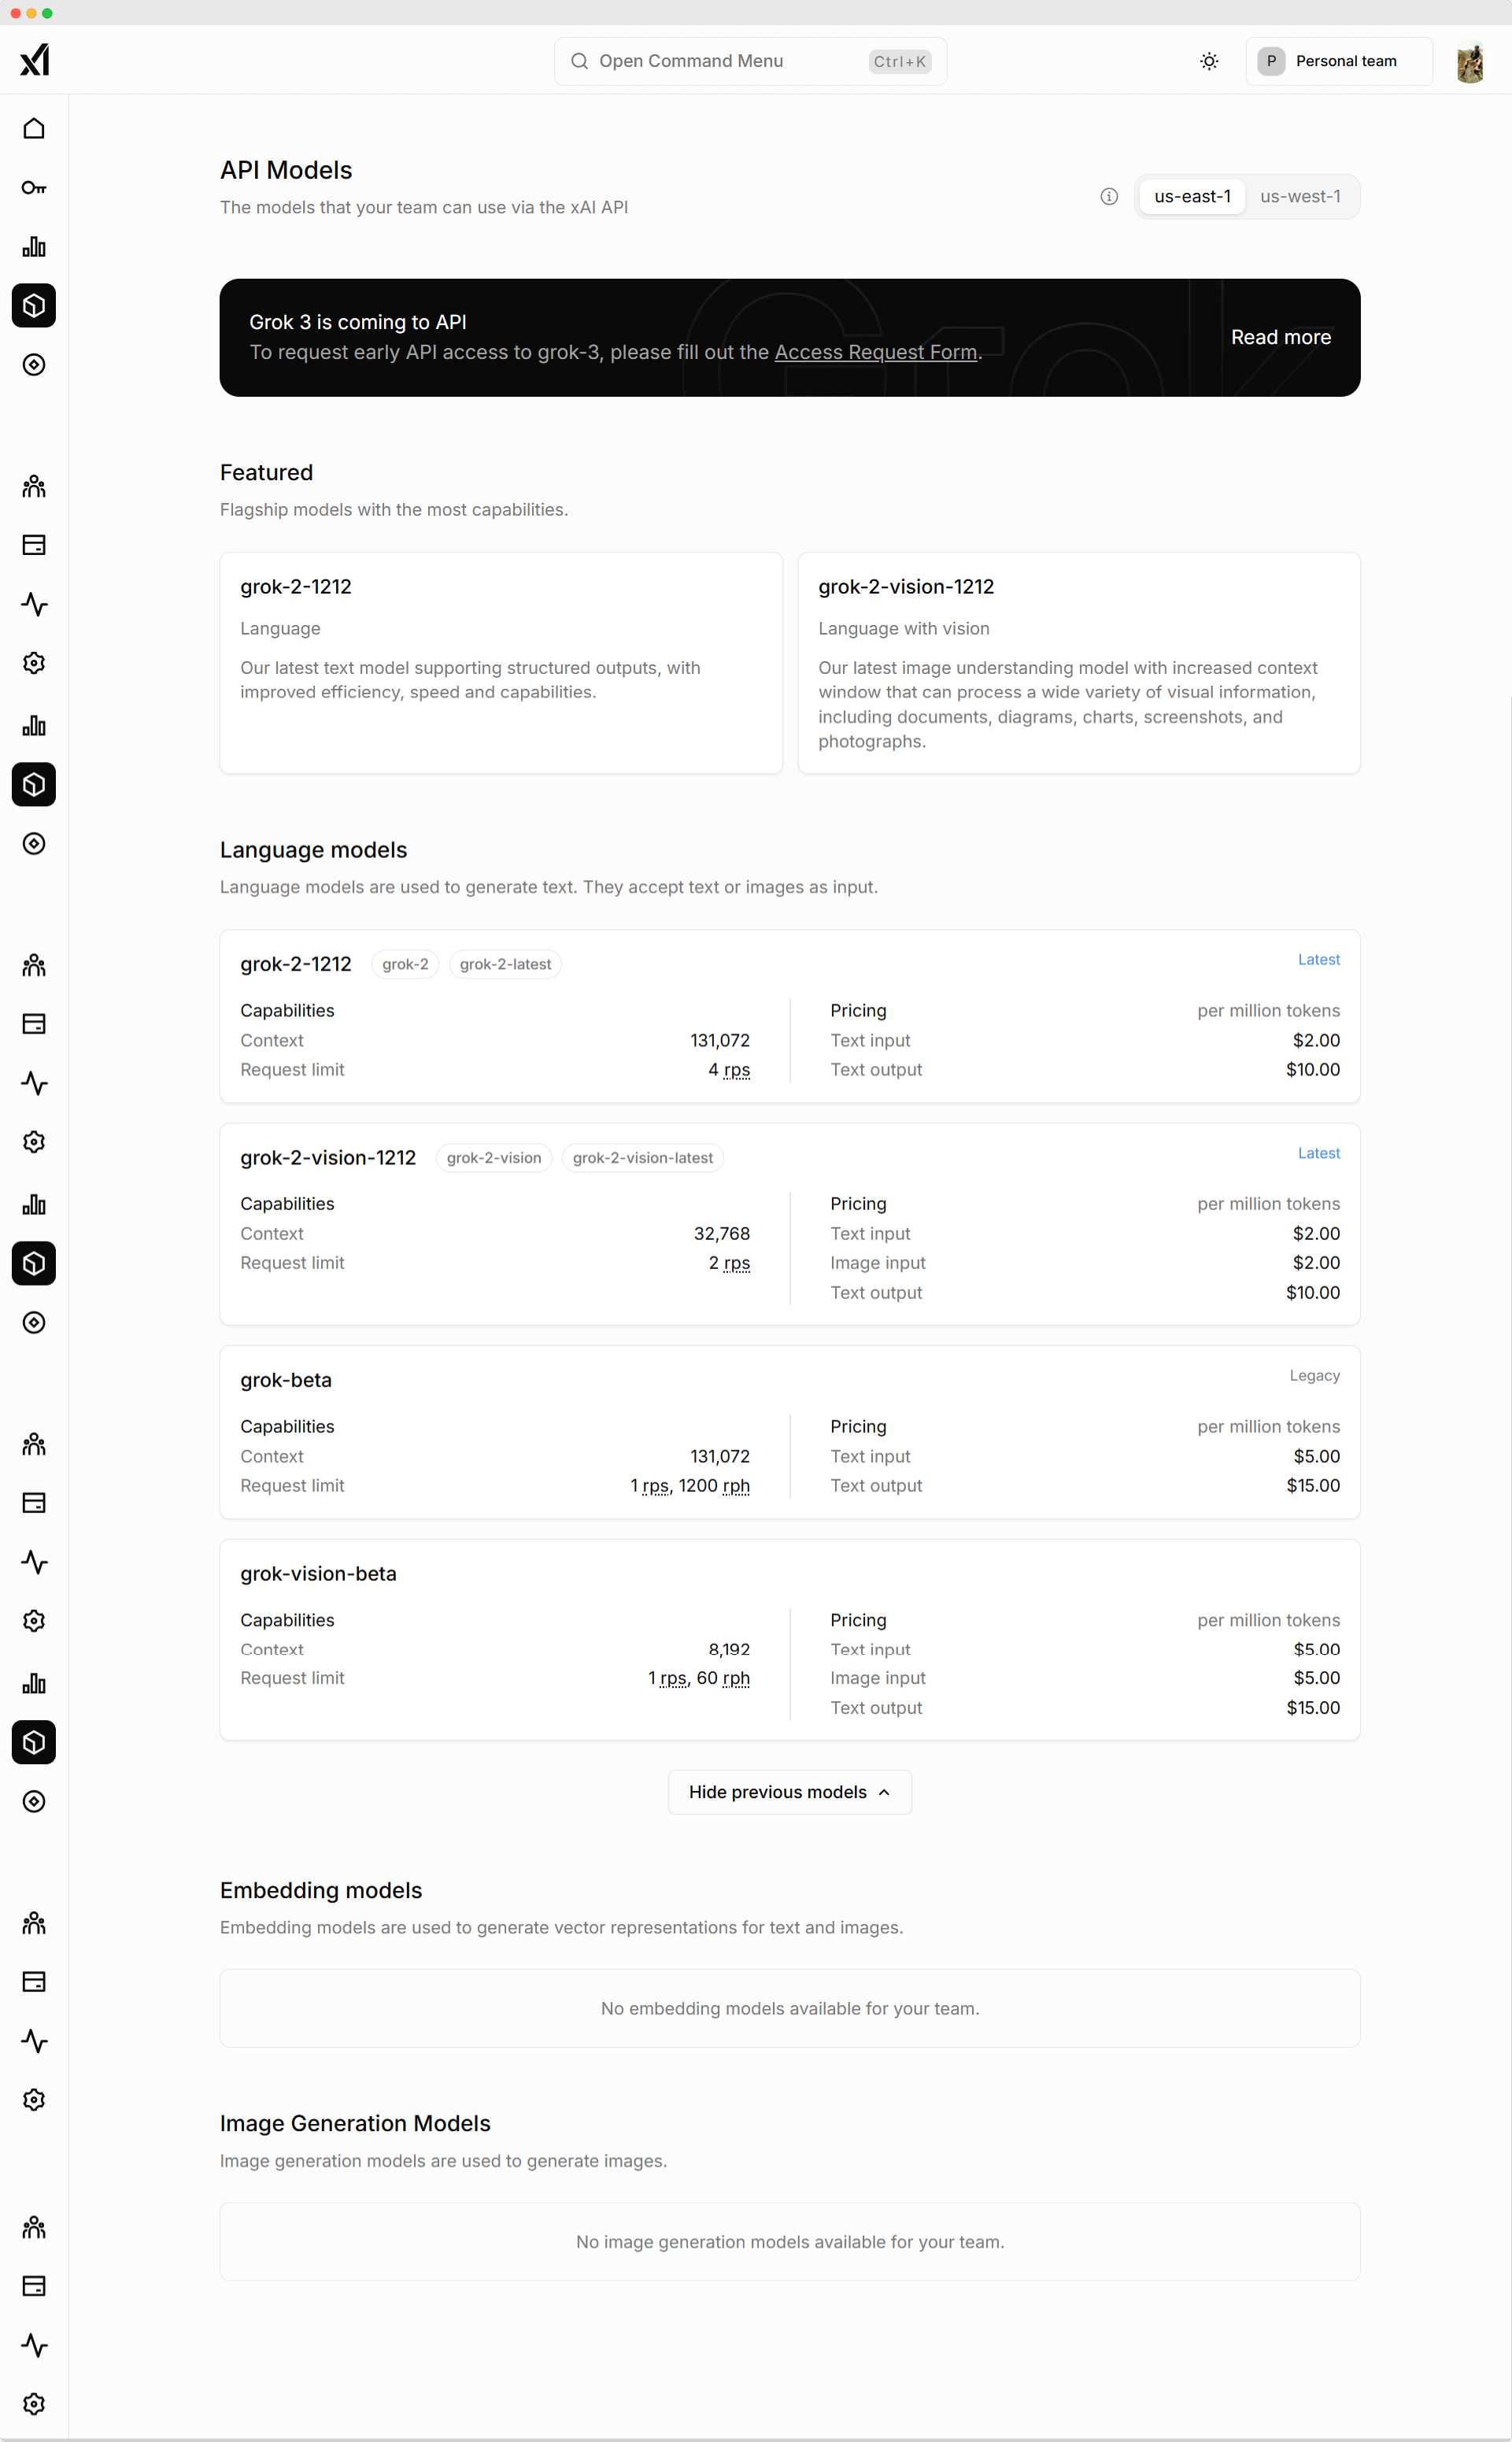
Just pop over to the AI models menu on the left side and take your pick to try out the models you like!
Also in my case, the Embedding and Image Generation models are not available. Maybe I need to use the API more to unlock both models.
Building a Python Streamlit App to Test Grok xAI API
Now here comes the fun part. In order to see the capabilities the Grok xAI has to offer, let’s build an interactive Streamlit app so we can explore it easily.
What we’re gonna build is a simple Streamlit web app with the following interface:
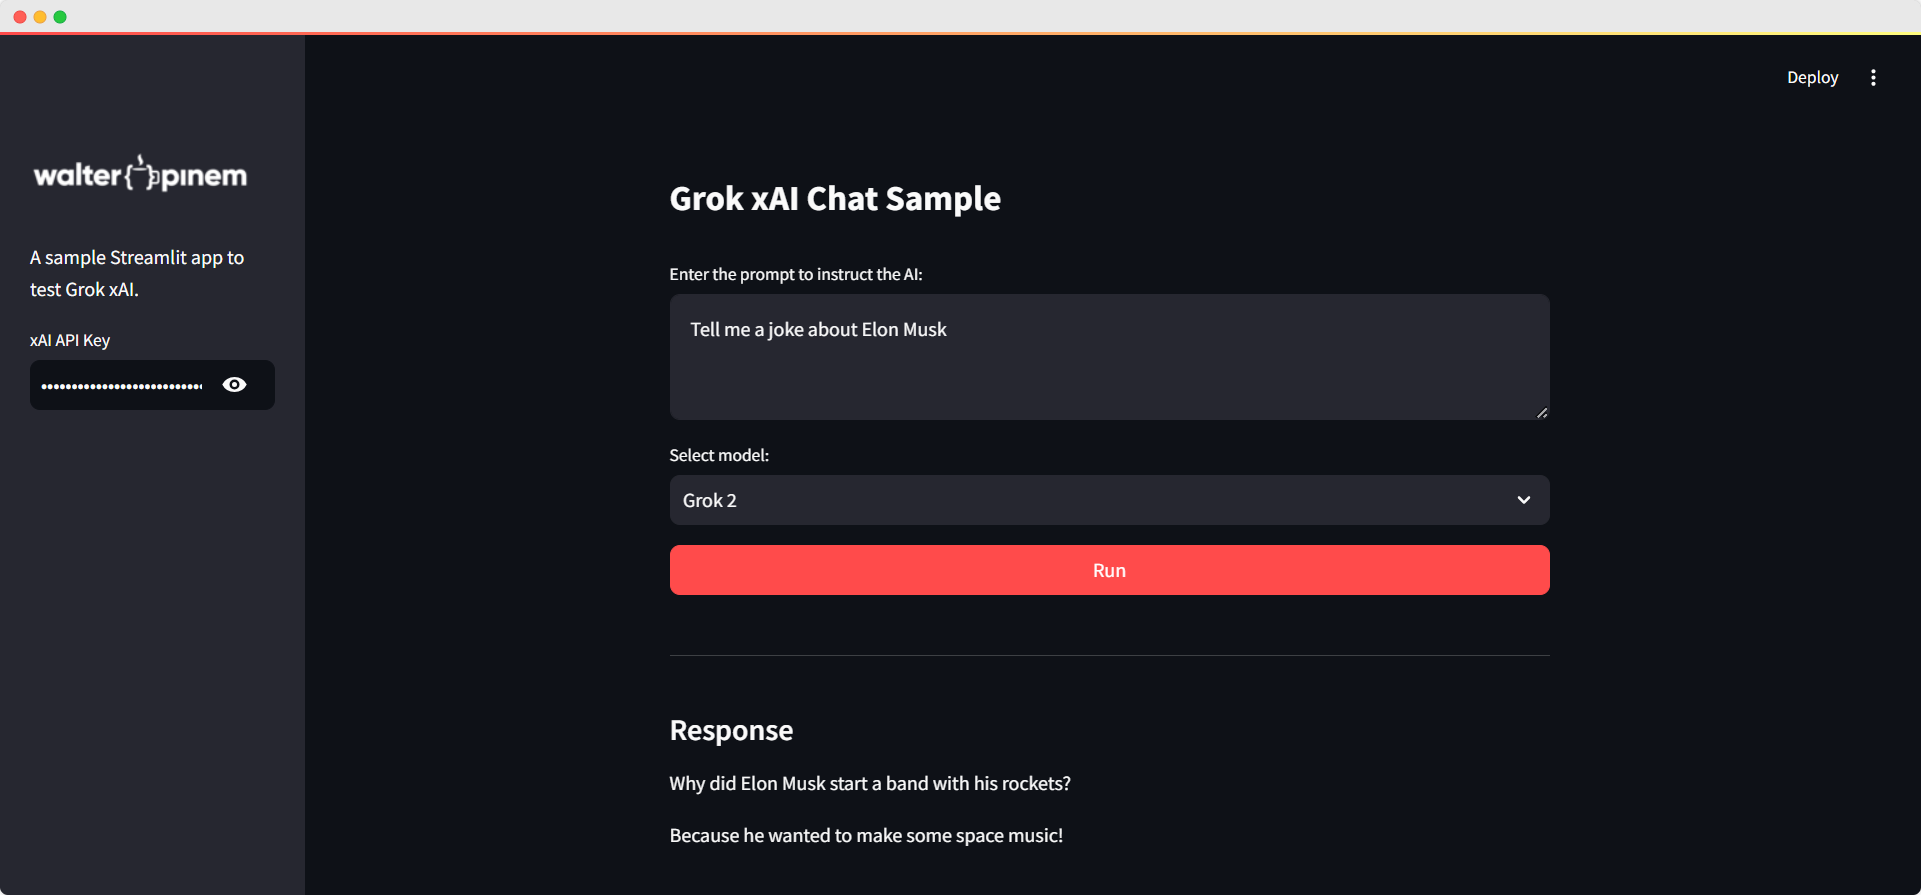
As you can see at the above screenshot, we just need to insert our xAI API key on the left sidebar, insert the prompt in the text area, select the AI model from the dropdown, and click the Run button to interact with the API.
If you feel much more comfortable to interact with the API via a web UI instead of terminal, then read on this guide.
Prerequisites
Before setting up and running your Streamlit app to explore the xAI API, there are a few setup tasks to complete first.
Confirm that Python 3.x is installed on your computer. Setting up a dedicated Python virtual environment for this project is highly recommended—it keeps everything organized and prevents potential conflicts.
Here’s how you can get started:
1. Create a Python Virtual Environment
Open the terminal (or Command Prompt for Windows users) and move to your project directory. After that, execute the following command:
python -m venv grokxai_envThis command creates a virtual environment named grokxai_env in your project folder. Activate it by running:
On Windows:
grokxai_env\Scripts\activate
On macOS/Linux:
source grokxai_env/bin/activate
2. Install Required Packages
In this case, we will just use the already available OpenAI Python SDK since I’ve installed it already. You can use some other methods.
Activate your virtual environment and install Streamlit along with the OpenAI Python SDK using pip to ensure compatibility with the Grok xAI API and any other required dependencies:
pip install streamlit openai
This command installs the Streamlit framework for building our interactive web application and the OpenAI package necessary to communicate with the Grok xAI API.
3. Project Structure
Arrange your project directory with all essential files in place. For this application, include your main Python script (e.g., app.py) and a logo file if needed.
A clear structure is as follows:
grok-xai-chat-app/
├── app.py
└── logo-white.png
Change the logo name or remove it entirely.
With all prerequisites met, the Streamlit app is ready to run.
Run the command streamlit run app.py in the terminal, and the interactive Gemini AI Chat Sample app launches automatically in your default browser.
Configuring the Streamlit Page
Before anything else, I configure the Streamlit page to set the stage for our app. I use the st.set_page_config() function to define the page title, layout, and icon.
This ensures that users see a polished interface as soon as they open the app.
st.set_page_config(
    page_title="Grok xAI Chat Sample",
    layout="centered",
    page_icon="✖️"
)
This snippet sets the page title to “Grok xAI Chat Sample”, centers the layout for a neat appearance, and uses a unique icon to give the app a distinct look.
Setting Up the Interface
Once the page is configured, I establish the main content area and sidebar.
In the main area, I display a title using st.title(), and in the sidebar, I add branding elements such as a logo and a brief description. I also prompt the user to enter their xAI API key securely using a password input.
st.title("Grok xAI Chat Sample")
with st.sidebar:
    st.image("logo-white.png", width=180)
    st.write("A sample Streamlit app to test Grok xAI.")
    api_key = st.text_input("xAI API Key", type="password")
By organizing the interface this way, I ensure that the essential configuration (the API key) is isolated in the sidebar while the main area remains dedicated to user interactions.
Injecting Custom CSS
To further refine the app’s appearance, I inject custom CSS using st.markdown(). This allows me to adjust the sidebar’s width and control the image sizes for a consistent, professional look across devices.
st.markdown(
    """
    <style>
        h1 { font-size: 1.75em !important; }
        section[data-testid="stSidebar"] {
            width: 200px !important;
        }
        section[data-testid="stSidebar"] img {
            max-width: 180px !important;
            height: auto;
            width: 100% !important;
        }
    </style>
    """,
    unsafe_allow_html=True,
)
This CSS snippet customizes the header font size and sets specific dimensions for the sidebar and its images, ensuring the interface looks tidy and consistent.
Handling User Input
The core of our application is letting users interact with the AI. In the main area, I create a text area where users can enter the prompt for the AI. This is where they provide instructions for generating travel itineraries or any other content.
prompt = st.text_area("Enter the prompt to instruct the AI:", value="")
This simple text area captures the user’s input and stores it in the prompt variable for later use.
Selecting the AI Model
Next, I provide a dropdown menu for selecting the AI model. This flexibility is crucial since Grok xAI offers multiple models. I define a dictionary of model options and use st.selectbox() to let users choose the one they prefer.
model_options = {
    "Grok 2": "grok-2-latest",
    "Grok Beta": "grok-beta"
}
selected_model_label = st.selectbox("Select model:", list(model_options.keys()))
selected_model = model_options[selected_model_label]
This step ensures that the selected model is correctly mapped and used in our API call later in the script.
Right now only those two models are officially available for chat completion as of the day I’m writing this post. Grok 3 is coming soon to the API, so we’ll test that later as well.
Triggering the API Request
Once the user has provided the API key and prompt, they can click the “Run” button to trigger the API request. Before making the call, I validate that both the API key and the prompt are not empty.
if st.button("Run", type="primary", use_container_width=True):
    if not api_key:
        st.error("Please enter your xAI API Key in the sidebar.")
    elif not prompt.strip():
        st.error("Please enter a prompt to instruct the AI.")
    else:
        ...
If either is missing, an error message is shown using st.error(). This validation step is essential for ensuring that the API call doesn’t fail due to missing inputs.
Setting Up the API Client and Preparing the Request
With valid inputs, I then initialize the OpenAI client using the provided API key, but with a twist: I set the base_url to Grok xAI’s endpoint. This allows me to send requests specifically to the Grok xAI API.
client = OpenAI(
    api_key=api_key,
    base_url="https://api.x.ai/v1"
)
Next, I define the conversation messages that will be sent to the API. These messages include a system prompt to establish context (“You are a helpful assistant.”) and the user’s actual instruction from the prompt.
messages = [
    {"role": "system", "content": "You are a helpful assistant."},
    {"role": "user", "content": prompt}
]
Executing the API Call with a Spinner
To improve the user experience, I use a spinner to indicate that the app is waiting for the AI response. Within the spinner’s context, I call the API using the client’s chat.completions.create() method. I pass the selected model, set stream to false (so the response is returned as a complete message), and provide the conversation messages.
with st.spinner("Waiting for AI response..."):
    try:
        response = client.chat.completions.create(
            model=selected_model,
            stream=False,
            messages=messages
        )
        st.write("---")
        st.markdown("#### Response")
        st.write(response.choices[0].message.content)
    except Exception as e:
        st.error(f"An error occurred: {e}")
If the API call is successful, the response is displayed beneath a horizontal rule. If an error occurs, it’s caught in the except block, and a friendly error message is shown using st.error().
The Full Grok xAI API Streamlit App Script
Here’s the full Python script:
import streamlit as st
from openai import OpenAI

# Configure the Streamlit page
st.set_page_config(
    page_title="Grok xAI Chat Sample",
    layout="centered",
    page_icon="✖️"
)

# Set up the page title and sidebar content
st.title("Grok xAI Chat Sample")
with st.sidebar:
    st.image("logo-white.png", width=180)
    st.write("A sample Streamlit app to test Grok xAI.")
    # Sidebar: Enter your xAI API Key
    api_key = st.text_input("xAI API Key", type="password")

# Inject custom CSS to adjust sidebar width and image sizing
st.markdown(
    """
    <style>
        h1 { font-size: 1.75em !important; }
        section[data-testid="stSidebar"] {
            width: 200px !important; /* Set the width to your desired value */
        }
        section[data-testid="stSidebar"] img {
            max-width: 180px !important;
            height: auto;
            width: 100% !important;
        }
    </style>
    """,
    unsafe_allow_html=True,
)

# Main area: Text area for entering the prompt
prompt = st.text_area("Enter the prompt to instruct the AI:", value="")

# Main area: Dropdown for selecting the AI model
model_options = {
    "Grok 2": "grok-2-latest",
    "Grok Beta": "grok-beta"
}
selected_model_label = st.selectbox("Select model:", list(model_options.keys()))
selected_model = model_options[selected_model_label]

# Button to trigger the API call with improved error handling and spinner
if st.button("Run", type="primary", use_container_width=True):
    if not api_key:
        st.error("Please enter your xAI API Key in the sidebar.")
    elif not prompt.strip():
        st.error("Please enter a prompt to instruct the AI.")
    else:
        # Create the OpenAI client with the provided API key and xAI base URL
        client = OpenAI(
            api_key=api_key,
            base_url="https://api.x.ai/v1"
        )

        # Define conversation messages: system prompt and user instruction
        messages = [
            {"role": "system", "content": "You are a helpful assistant."},
            {"role": "user", "content": prompt}
        ]

        # Use a spinner to indicate that the response is being generated
        with st.spinner("Waiting for AI response..."):
            try:
                response = client.chat.completions.create(
                    model=selected_model,
                    stream=False,
                    messages=messages
                )
                # Display the AI response with a horizontal rule separator
                st.write("---")
                st.markdown("#### Response")
                st.write(response.choices[0].message.content)
            except Exception as e:
                st.error(f"An error occurred: {e}")
It’s also available on Github. Fork it, extend and customize it as much as you like.
Wrapping Up
This Streamlit app for testing the Grok xAI API is a simple yet powerful example of how you can build an interactive interface to experiment with advanced AI models.
By combining user input, API integration, and dynamic output, I’ve created a tool that not only demonstrates the capabilities of the Grok xAI API but also provides a foundation for building more sophisticated AI-powered applications.
I built this app to streamline testing and development, and I hope you find this guide useful for your own projects!